I just received word that Randy to the Rescue is to premiere June 15th!!!! That's a heck of a lot sooner than the expected late July/August! But here is the latest clip! I am the one in the dress with him putting on my brown sash and then again I am the one he is hugging! Yippee!!!
Warning: HENRY DO NOT WATCH! This one has my actual wedding dress! LOVE YOU!
http://tlc.howstuffworks.com/tv/randy-to-the-rescue
Thursday, March 29, 2012
Tuesday, March 27, 2012
Wedding Inspired Wednesday {No. 9}: Burlap Engagement Bunting How-To
After many days of browsing  for wedding ideas I came across engagement photos with buntings. Each one was different, with it's own style. Fabric buntings, paper buntings, buntings with sayings, buntings with numbers, etc. Since our engagement photos were coming up I decided to come up with one of our own! Our wedding theme is, "Country Boy Meets City Girl", so it was only fitting for our Six-O Ranch engagement photo location to use a burlap bunting strung with twine.

Materials:
- Burlap - Hancock Fabrics 1 yard $3
- Ball of Twine - $7 at Wal-mart
- Freezer Paper - Wal-mart
- Iron
- Ironing board
- Ink-jet Printer
- No-Sew stitching glue - $6 Hobby Lobby
- Cardboard "stencil" - Cardboard box from garage :-P
- Magazine
- Scissors
- Tape
Preparing burlap for direct printing:
I took my burlap, freezer paper, iron & ironing board to prepare the burlap for direct printing. With the burlap ironed & flat on the ironing board, I took a piece of freezer paper, not too big, & laid it on top of the burlap - shiny side facing the burlap. On medium, NO STEAM, heat I ironed the freezer paper to the burlap. It takes a few minutes, but the freezer paper eventually sticks to the burlap - which is easily peeled off later.
With the magazine, I traced an 8x11 outline on the freezer paper, then cut out the outline of freezer paper/burlap. Your burlap is now ready to be fed through the printer for printing! I used a font called, "Bleeding Cowboy" that we intend to use for other wedding stationary.
Printing:
Choose your wording on Microsoft Word, put the burlap/freezer paper in the printer like you would normal paper - pay attention to which way it needs to face to print on burlap, not freezer paper. Print! Peel off your freezer paper & TA-DA! You now have your printed burlap!
Assembly of Bunting:
I decided to do a shape different from the typical triangular bunting, especially since I needed a bit more room for the wordings. I took the flap of a cardboard box and cut out the shape of choice. I then used double sided tape & lined the edges of the cardboard to hold the burlap in place as I cut around the burlap edges. Take your twine & cut to desired length.
 |
| My bunting in the original 8x11 form right after printing - prior to cutting them with the cardboard outline |
Using the No-Sew stitching glue, put a good amount on the burlap at the desired spot - I chose to do an inch below the top - and press the burlap onto the twine. The glue will seep through a bit & will be white, but it dries clear. :-) Give it a good 24 hours before handling to make sure the glue really sets. :-) Since we were going to be outside, I then glued a 2nd piece of burlap to the back of each individual bunting shape. This was to make the letters stand out better & to add weight to the light burlap in case of wind. THAT'S IT! Now enjoy your bunting masterpiece.
 |
| The bottom right burlap you can see I have glued the twine 1in from the top, burlap in top right |
Keep in mind you could line your bunting with the twine, jewels, lace, etc. The options are endless!
 |
| Bunting strung across our fireplace mantel until it was time to be used - hence the boo sign, this was back in October haha |


These two were worn by our adorable puppies! I braided the twine to make it easier to tie around their necks.
Check back to see the final photos taken by the wonderful photographer, Michelle Peyronet < click the link the check out her work! :-)
 |
| One of our favorite engagements utilizing the dogs and their buntings! |
 |
Here is the final 5x7 Magnet Save-the-Date that Michelle Peyronet designed for us! It doesn't have the best clarity using my iPhone of it up on our fridge, but you get the point :-) |
Wednesday, March 21, 2012
Wedding Inspired Wednesday {No. 8}: DIY Wedding invitation Class!
More Photos to Come!!
Since I have slacked a bit on my Wedding Inspired Wednesday blogging, I decided to make up for it a bit by posting TWO this week! Enjoy {No.7} listing a few fabulous country/Texas country first dance songs & this one, {No.8}!
This past weekend I had the pleasure of taking a DIY Wedding Invitation Class at Paper Planet with my fabulous in-law family - Blondie {Mother-in-law-to-be}, Audrey {Sister-in-law-to-be/bridesmaid}, Megan {Cousin-in-law-to-be/bridesmaid} & Terri {Henry's aunt twice removed hehe}. These women are some of the most fun women to be around! They are laid back, go-with-the-flow, down to earth, sweet, funny as can be women! Now to my knowledge, none of them are really in to DIY crafts - with exception of Megan. I am pretty sure if it weren't for me pestering them, they would have been perfectly content NEVER taking this class or any class of the sort. However, they love me sooooo much they were willing to give it a shot, cough up $50 and Marissa, our instructor for the class, gave each of us two bags - bag one was filled with various kinds of paper. Marissa went over each kind of paper, what it was good for, what you needed to be careful for ie. smudging etc. and ways to use them with each other. Bag two was filled with 5 different invitations/ribbon that she was going to use to help us construct 5 different invitations using various techniques/papers/bows/etc. It also had a tiny notebook - this notebook gave you the tools you needed to calculate exactly how much paper to use for whichever card design you chose, so you wouldn't waste paper or spend excessive money. It also included ribbon sizes for the various bows/knots we would be tying, as well as explained all the different envelope sizes so you could cut your paper to fit the envelope accordingly. VERY HELPFUL INFORMATION!
 |
| Audrey & Megan - Say Cheese! - Waiting with their two bags for us to begin! |
 |
| Hot-glueing the ends of one ribbon together - Audrey glueing on paper - pressing the ribbon together with a boning stick, Megan using her fingers - we were all guilty of one or the other. |
 |
| Terri with her perfect "love knot" ready to be glued to the card |
 |
| Left Invite: Love Knot on the back side of the invite |
 |
| Left invite: Front side of Love Knot invite - Ribbon was hot-glued to the silver pocket invite, followed by a blue, sheer, tissue-like, glitter paper glued to the invite with a glue stick, and finally the cardstock paper hot-glue on the very top |
Next was a simple knot - well not so simple as it looked when Marissa did it. haha We eventually got it down, and then it was easy as pie! We were able to use this knot on two separate invitations. Then we learned the use of a boning stick to create straight folding edges. Being a huge scrapbook-aholic, WHY HAVE I NEVER SEEN THIS BEFORE??? Makes crafting a lot easier and opens so many doors for ideas! haha We also learned here which paper was ok to use hot-glue and which ones you needed to use the extra strength glue stick.
 |
| The simple knot, cut on the ends in a "happy bow" as Marissa put it haha I never thought of it before, but it makes sense |
 |
| The simple knot used again - This invite was one of my favorites! I love the fabulous patterned paper with subtle metallic accents. We used the boning stick to crease the patterned paper at 1 1/2 inches, we then hot-glue hot pink paper up under the crease, followed by the ivory cardstock on top of the hot pink - THEN we hot-glued the 1 1/2 of creased patterned paper on top of the ivory paper. Get it? Kind of confusing, maybe? We were then able to hot-glue the center of the simple knot in the center, wrap the edges of the ribbon around and hot-glue the ribbon ends to the back of the patterned paper. FINALLY, we hot-glued the maroon cardstock paper to the back of the patterned paper and TA-DA! DONE-SKIS! |
 |
| Group photo of the finished card! The top colorful paper was creased perfectly with the boning stick, then our finished bow placed on top! This was such a fun, colorful card! |
The final knot was actually a beautiful green bow. With it being St. Patty's Day we HAD to make a green invitation! :-) This was rather hilarious to make. Left over right, pull left under, pull the two bows and ribbon ends at the same time to get the middle knot tight and the bow just right! Whew! I can't wait to use this idea for a future baby shower! The bow was super cute in the end.
 |
| Terri with her ribbon left over right |
 |
| Pull all four to get bow nice and tight |
 |
| Terri's beautiful bow! |
 |
| Blondie's beautiful Bow! |
 |
| Myself and my bow! To finish it off, hold the invitation where the bow is verticle (bow on left side if you are right handed) and cut the ends with scissors straight up, parallel to the bow itself. You get a perfect bow! |
 |
| This was a simple 3-layered invite. We were able to hot-glue one end of twine to the back of ivory cardstock, wrap the twine strung with a horseshoe charm around the cardstock in any fashion we chose, followed by hot-glueing the other twine end to the back of the cardstock. Hot-glue the ivory cardstock to the brown textured paper, followed by hot-glueing the brown textured paper to espresso brown cardstock and you are done! Lovely right? This is perfect for a rustic wedding/rehearsal dinner/shower/party - whatever you choose! Not to mention you could easily change the charm. Since we will be using horseshoes in our wedding, it was perfect! |
 |
| Marissa giving the boning measurements |
 |
| Marissa providing more measurements |
 |
| I am pretty sure I just burnt myself - haha - The outside ends of the pockets were glued down first |
 |
| Then the inside fold of the pockets were cut to prevent too much bulkiness when folded and the inner side of the pocket glued |
 |
| The basic invite finished! |
When all the invites were assembled and photos were taken, we all decided on paper we thought would be appropriate for the rehearsal dinner invites and wedding invites. Marissa then did all the calculations so we could order the hand-made paper in batches to ensure colors were the same across the board. After all the layers of paper, envelopes, ribbon, charms etc. were picked for both invites & rsvp cards we paid around $350 total - that was for 25 rehearsal invites, 125 wedding invites, 125 rsvp cards - plus all corresponding envelopes, etc. That is not bad at all - to me. That still leaves me $200 in our stationary budget to buy paper for ceremony programs, name tags, menus, and thank you cards. Sweet! Not to mention, we will make some wonderful memories assembling these together when we come back in April once the paper orders are delivered. I can't wait! You can bet your bottom after ours are mailed, I will be posting a DIY tutorial!
 |
| My three favorite invitations made that day! Notice the green bow is cut! If you hold it vertical can you see what I meant by holding it vertical and cutting the ends? Ehhhh? I will be recreating these. Kind of considering making cards for every event possible for the rest of my life! haha |
 |
| All the invitations except one! Standing in front of the giant hand-made paper wall! |
Wedding Inspired Wednesday - {No. 7}: Texas Country/Country 1st Dance Song Suggestions

Henry and I have been browsing tons of wedding song potentials for our 1st dance. Well, we can't seem to agree despite the fact we have found TONS of great ones. haha SO, for those looking for Country or Texas Country first dance songs, here are some we have found:
Wade Bowen - Who I am
This is a great song to dance to. I love the words, his voice - everything. This would be my number one pick - but Henry for some reason said no Wade Bowen. Boo.
Josh Abbott Band - She's Like Texas
Henry is such a sweetheeart. He consistently picks out songs that are pretty much the guy singing about his love to the girl. Well I want one that is one we could dedicate to each other. This song is amazing, but yet another one we don't agree on. ha!
Josh Turner - Soulmate
Now this song is not "Texas" country - but Henry and I love Josh Turner. This song would be perfect, but we are looking for an up-beat song we can two-step to or double 2 step to. Beautiful song!
Josh Turner - Would You Go With Me
This is one of Henry's top 3 songs for our first dance. We love the pace, his voice, the words - besides, your wedding is the first step in a new journey, so "Would you go with me?"
Midnight River Choir - Soul Food
I LOVE THIS BAND! I love his voice, their style of music, everything. Every time I hear this song I think of Henry and can't help dancing or at least bobbing my head - whether I am sitting in my car or walking around listening to my iTunes - this song makes me move :-) Unfortunately, it is so new I can't find full clips of the video - here is a good clip though to give you an idea.
Blake Shelton - HoneyBee
This is another one of our top 3 picks. It's cheesy, country, lovey-dovey, fast, & pretty much perfect! Yes he isn't Texas Country, but boy can he sing! :-)
Blake Shelton - God Gave Me You
Now this has to be one of the sweetest songs ever. This is one of MY top 3.
Josh Grider Band - Crazy Like You
Another band & song I love. The lyrics are so true about love! Sorry I couldn't find a better video.
Easton Corbin - Roll With It
I know this song doesn't talk about endless devotion and all the mushy-gushy stuff people think of when they think first dance - to me this song is taking life as it comes - good or bad - you just go with it, side by side. It's simple & sweet - not to mention a good song to country dance to!
Tuesday, March 13, 2012
Wedding Fitness!
I have always been in pretty decent shape. However, lately I have been skinny, but fat skinny. There is such a thing! I mean, just because I am "skinny" does not mean in any way that I am healthy. This has caused me to have major self-image issues. I see pictures from a year ago, two years ago and then I see myself now and sigh. lol SO, instead of moping around & complaining about it, I am being pro-active!
My fiance and I bought fitness books last year - Men's Health Big Book of Workouts & Women's Health Big Book of Workouts - and this was the best thing ever! It gives a little intro about eating, then it breaks down each muscle group into a section with corresponding work-outs. Towards the back it has various work-outs already made for you - "Pre-natal workout" "Wedding Workout" "Crowded Gym Workout", etc. Each one has colored photos with numerous tips to ensure they are done correctly along with variations of each workout to either make it easier or harder. FABULOUS!
Best work-out so far - "Beach Body Workout". I mean this one slightly kicked my butt, but pushing myself through these workouts gave me amazing results! I was ready to flaunt it in a bikini 24/7. Within 2 weeks I saw major definition changes.
With the wedding right around the corner now, I am needing that work-out again. However, I am lacking MAJOR motivation lately. Henry's cousin, Tacey, is a personal trainer at the local gym where we work out. So one fabulous day, Henry informs Tacey I need a personal trainer. Yesterday was day 1 - Oh my lord did she kick my butt! She isolated each muscle group and did a full body work out. Instead of my typical low weight, 12 reps, 3 set workouts I do, she did HEAVY weights, higher reps, 1 set for EACH muscle group - such as inner thigh, outer thigh, hamstrings, quad & calves, then lower back, upper back, abdominals & obliques, etc.
I was doing typical sit-ups the way I always have & she informs me I am going down too far. She sticks her hand under my back about half-way and said, "When you feel my hand on your way down, that's as far down as you should go" - HOLY MOLY! My stomach burned like it never burned before! I had to grab onto something to pull myself back up at the end, I literally felt my stomach muscles quivering. After it was all said and done, I could barely turn my steering wheel to back out of my parking spot. It was a GREAT workout. haha Wednesday is day 2 after my hour long Zumba class. Let's see how that goes.

My fiance and I bought fitness books last year - Men's Health Big Book of Workouts & Women's Health Big Book of Workouts - and this was the best thing ever! It gives a little intro about eating, then it breaks down each muscle group into a section with corresponding work-outs. Towards the back it has various work-outs already made for you - "Pre-natal workout" "Wedding Workout" "Crowded Gym Workout", etc. Each one has colored photos with numerous tips to ensure they are done correctly along with variations of each workout to either make it easier or harder. FABULOUS!
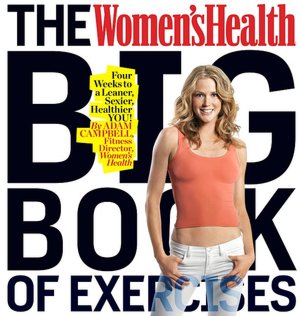 |
| Cover of the book |
 |
| Spring Break Post Beach Body Workout |
 |
| Local Gym where we work out! Dang refers to Dr. Dang - an Aggie Doctor who also just happens to be from my high-school as well. Crazy - same high-school, same college, same new small home-town. |
Monday, March 12, 2012
Ups & Downs of Wedding Planning: What matters to you, doesn't always matter to others
I am sure most all Brides-to-be, whether past or present, can relate to this in one way or another. Getting married is suppose to be one of the happiest times of your life. It's a time where family & friends come together to celebrate a joyous occasion regarding love & a new beginning. Along the way, you want those most important to you to be involved. Naturally, right?
I am a huge memory person - it's all about experiences to me. I LOVE scrapbooking, so I am always looking for moments that are a "first", or a great bonding moment that I could then later scrapbook about. I guess when I first got engaged I had all these ideals of fabulous bonding moments. A mother on top of everything, friends over all the time - just this blissful state that would last for months of friends and family jumping for joy to help with wedding stuff LOL. Well that is far from reality.
I fully understand that my situation is very different from others - I live 5 hours away from all of my family who live in Houston, I have bridesmaids across the US - Michigan, South Texas, College Station, Houston, San Marcos - and have had the longest engagement ever! haha However, those few rare moments I do have that could involve everyone - when the people I want to spend the most time with, don't care to help at all, it's like a stab in the heart. Over dramatic? Maybe. But remember, memories are the most important to me. I don't care about gifts, I don't care about material things - all I want is their time. My "love language" is "Quality Time" according to the 5 Love Languages {Which I fully recommend everyone reading this book! It's so insightful!} It's not like I live across the country - excluding Michigan bridesmaid Riki, in her case I do lol - so is it really that hard for those few people to take 24-48 hours out of their busy lives to help with something that obviously means a lot to me? It's not like this is a birthday or holiday that comes around every year {God willing we are around for the next year} this is a wedding, my wedding, a once in a lifetime thing! {Again, God willing haha}
I guess I have realized that there are just some people out there, no matter how close to you they are, just don't care and will never care about the things I care about. Some of those people have even straight up said to me "....have a nice life..." Words like that hurt! So no matter what, some "close" people will never share in the joy of my wedding planning, wedding day, future kids, or just plain future. Period. It sucks! I am tired of the one way streets though, constantly being the one to go to them, the double standards, being told they will do stuff when they in reality never do, having important things dangled over your head to have things done their way, etc. But as you grow older your priorities change, people come and go in your life, you tire of the games and realize they aren't worth it. They just plain aren't worth it - and it's time to move on.
Friday, March 9, 2012
Committed Family Members
I have truly been blessed to have such a wonderful in-law family. Most of the time when it comes to wedding planning you hear of "Monster-in-laws", in-laws who have too many opinions, in-laws who don't really help at all, etc. Not this lucky lady! I have fabulous in-laws!
Henry's mom is the best mother-in-law-to-be I could have ever been blessed with. Henry really takes after his mom, she is like the female version of him. She is not this prissy girly-girl. She is your true southern, down-to-earth, sweet-as-can-be mother! Ever since I have met her, she has treated me like another one of her own. The best thing about her, NO DRAMA! She is just so chill and kind-hearted - and very easy to please. I love her to death - can you tell?
Henry's sister, Audrey, who is now a bridesmaid has become one of my very good friends. I remember the first holiday at his parent's house his Mammer (who I had no idea who she was at the time) comes walking up to the house as we stand on the front porch and hugs me, greeting me as if she has known me forever - then she calls me Audrey. Henry laughs and informs his Mammer I am not Audrey, but his girlfriend. Mammer squints her eyes, says, "Oh! HAHA! Sorry. You look just like her!" - Henry then tells me his Mammer is losing her eye-sight, apologizes, and we laugh. I do feel Audrey and I have a lot of similarities - personality-wise and body-type wise. What I especially love is Audrey's care-free attitude as well, just like her Momma. Not to mention she is down-right HILARIOUS! She also has been so eager to help through this whole wedding process and I adore her!
Henrys aunt, once-removed?, Terri has also been fabulous! Terri is the mother to one of Henry's closest cousins, Randy - who is a groomsmen. Terri has been my constant motivator to work out - we lately have been doing pretty good. I think we have been working out at least 3 times a week together. See, I am great at doing what I want to do, when I want to do it. Working out - eh - the idea of a great body sounds fabulous, the motivation to keep at it, not so great. I mean, who doesn't want to plop on the couch after a long day of work and munch on some fatty-goodness???? Apparently, Terri! Because before I get off work I almost ALWAYS have a text from her, "Zumba?" "Beach Body Workout?" "Track?" "Gym tonight?" LOL - God do I love her for that {I am sure Henry does too}. Now besides being my personal motivator to be in good shape, she is Mrs. Do-It-All - Anything I need help with, or anyone for that matter, she some magical way, finds time to do it all! With a smile I might add. Addressing/labeling/stuffing/sealing Save-the-Dates? DONE! Wedding invitation class? DONE! Making invitations? DONE! Bachelorette Party? DONE! She never ceases to amaze me - along with every other woman in Henry's family - for the most part. :-D
Henry's cousin, Megan, is the most recent addition to the Bridesmaid clan! Megan is in 10th grade currently, she is like my new found best-friend, despite the age difference {Which just dawned on me - it's almost a 10 year age difference! HOLY MOLY that made me feel old}. Almost every time Terri and I go to the gym, Megan is picked up along the way and dragged with us. :-) Luckily we live so close together. I am also SO THANKFUL she is crafty too! We have made Crayon Art <----tutorial found there----together, I roughly taught her how to make a tutu which she beautifully made, and she will later be helping me make 2 for flower girls. She is my soon-to-be new scrapbooking buddy {just took her to Hobby Lobby to get materials}. She helped address/label/stuff/seal Save-the-Dates along with Terri. She will be taking the Invitation class with me along with Terri, Audrey and Blondie. And last for now, but definitely not least, she will be putting those newly learned skills to the test to help me MAKE the actual invitations with the above mentioned crew - plus my Seester. She is a sweetheart like all the other Johnson women.
So like I said, I have a truly amazing in-law family! They aren't over-bearing, rude, or overly dramatic - they just love having a good time and are eager to help where they can. I am very blessed! Which is great to have since I live 5 hours away from my own family - that makes their part harder to help with the distance. My sister has been exceptional though despite the distance, we talk on the phone, text each other - and don't forget the almighty Pinterest! She pins away on that sight with, "Hey! Go look at all the stuff I pinned on Pinterest today! We should do that!" - She is my ultimate best-friend and the best seester EVER - Period. End of story.
Now I wish I could adopt my co-worker too - her daughter who is also my friend, is also getting married rather soon! Unfortunately, they are in similar situations. My co-worker lives up here in the DFW area, her daughter/my friend, just recently moved to Houston with her fiance. My co-worker and I talk about wedding stuff all the time! Constantly brainstorming ideas, figuring out stuff we forgot, helping each other find deals on items - not to mention she has like a little notebook and every time we think of stuff she says, "Oh! That's a good one! I need to make sure I tell L----". She is so on top of everything for her daughter! I mean, they literally wouldn't need to hire a wedding coordinator because she is just organized beyond belief. I mainly love how she doesn't let the distance affect her involvement in her daughters wedding - no matter how far away, she is constantly calling vendors for her, thinking of stuff, doing whatever she possibly can. So - after L----'s wedding, I may steal her. lol
Needless to say, I am one lucky gal! I have a lot of wonderful people involved in my wedding - whether small or big, one time or the whole time, they all mean a lot to me - and I appreciate every small second, even if it wasn't mentioned above. :-)
Henry's mom is the best mother-in-law-to-be I could have ever been blessed with. Henry really takes after his mom, she is like the female version of him. She is not this prissy girly-girl. She is your true southern, down-to-earth, sweet-as-can-be mother! Ever since I have met her, she has treated me like another one of her own. The best thing about her, NO DRAMA! She is just so chill and kind-hearted - and very easy to please. I love her to death - can you tell?
 |
| Henry's Dad, Herman - Henry's Momma, Blondie - and ME! The wonderful day we both received our Aggies Rings!! WHOOP! |
 |
| After dating only 5 months - Henry's parents paid for us to go on a month long vacation through New Mexico & Colorado - with the last stop being a week in Vegas and a Hummer Limo. WOOHOO! This is a pit-stop along our scary, narrow, side of the mountain drive. So pretty! |
 |
| New Years 2010 out at Henry's parent's ranch in Hico - Herman & Audrey. <3 |
Henrys aunt, once-removed?, Terri has also been fabulous! Terri is the mother to one of Henry's closest cousins, Randy - who is a groomsmen. Terri has been my constant motivator to work out - we lately have been doing pretty good. I think we have been working out at least 3 times a week together. See, I am great at doing what I want to do, when I want to do it. Working out - eh - the idea of a great body sounds fabulous, the motivation to keep at it, not so great. I mean, who doesn't want to plop on the couch after a long day of work and munch on some fatty-goodness???? Apparently, Terri! Because before I get off work I almost ALWAYS have a text from her, "Zumba?" "Beach Body Workout?" "Track?" "Gym tonight?" LOL - God do I love her for that {I am sure Henry does too}. Now besides being my personal motivator to be in good shape, she is Mrs. Do-It-All - Anything I need help with, or anyone for that matter, she some magical way, finds time to do it all! With a smile I might add. Addressing/labeling/stuffing/sealing Save-the-Dates? DONE! Wedding invitation class? DONE! Making invitations? DONE! Bachelorette Party? DONE! She never ceases to amaze me - along with every other woman in Henry's family - for the most part. :-D
 |
| Terri & Randy, Henry's cousin/groomsman |
 |
| Terri & Henry at our Ring Dunk Party! |
 |
| Cute Lil Megan! More photos will be available after this weekend :-) |
 |
| Seester & I on Spring Break Vacation! |
 |
| Seester and I wearing nasty hats! Yuck! |
 |
| Co-workers Daughter, L, myself, & other co-worker, Stephanie out on one of our many girls nights watching Whiskey Meyers in concert, Downtown Fort Worth |
Wednesday, March 7, 2012
Wedding Inspired Wednesday {No. 6} - Stationary
It has come to the point in our wedding planning process where stationary has become my main focus. I am looking for ways to display the seating chart, assign tables, invitations, response cards, maps, etc. There are so many aspects of a wedding that involve stationary!
{1} Here is a cute DIY embossing idea from Lovely Little Details:
{2} Another DIY trick from Lovely Little Details: DIY Calligraphy!
{3} Bachelorette Party Fun! Here is a fun game for the bachelorette party:
{4} Name cards for seating:
{5} Speaking of seating - how about arranging the seating chart? All that re-arranging, last minute cancellations, last minute add ons, new found "enemies" or family feuds? Well fear not! Here is a wonderful, FLEXIBLE seating chart arrangement idea for all those last minute changes!


{1} Here is a cute DIY embossing idea from Lovely Little Details:
 |
| The photo is from the blog, which comes with a DIY video tutorial for a menu - but you could add this little twist onto just about any of your wedding stationary! |
 |
| Such a simple idea! She gives plenty of ideas on other places to use it as well! Example: black paper with a white pen to get that chalkboard look that is so popular right now! :-) Can't wait to give this one a try myself - I will let you know how it turns out hehe |
 |
| The photo above is an example from the game - from the authors blog page of course - it's basically a cute quiz regarding the Brides relationship to the Groom - The groom was asked a series of questions and the bridesmaids made these cute cards that were then used to Quiz the Bride - Every wrong answer = alcoholic beverage |
 |
| Courtesy of The Knot - I love this idea for a twist on traditional, plain jane name cards - especially since our wedding is rustic! You could easily combine this idea with the DIY calligraphy video posted above as well. :-) |
 |
| Courtesy of Martha Stewart Weddings - here is a fun flexible idea! Adhesive strips with the names on them - as suggested on the site, you could even create color-coded groups: bride's family, groom's family, friends, kids, etc. |
{6} Last, but not least: Thank you cards - now by no means do I think these should substitute a good old fashion "thank you card" personalized in the mail, but if you opt to not do a menu, or just want each guest to have a sweet sentiment to read, these two are good starters!
Both Photos are courtesy of Style Me Pretty
Hope you have found some inspiring ideas for your wedding stationary! Be sure to check back in a couple of weeks - March 17th I am taking a fabulous "Blueprint of a Wedding Invitation" class with bridesmaids, Audrey & Megan, Mother-in-law, Blondie, & "Aunt", Terri! Hopefully, I can post as many tips regarding DIY wedding invites as possible, not to mention helpful tips for any sort of wedding/event stationary!
Hope you have a fabulous Wedding Inspired Hump Day! XoXo
Subscribe to:
Posts (Atom)